Close

From Pointillism to Pixelization: Seeing the Big Picture
Lesson Plan, Grades 7-12, Art, Math, Painting, Mural
Description
Lesson Plan and Artwork by Franz Spohn
Images created by employing individual visual units is historic. Greek and Roman mosaics used individual tiles to create images. Native American used seed beads, and even corn in producing the Corn Palaces. In the electronic age, the PIXEL (short for picture element) is the modern unit used. Whether ancient or modern these seemingly insignificant units are the building blocks to create a final work of art (The Big Picture). Individual visual units are evident up close but work together to produce striking images when observed from a distance.
Objectives
- Learn how to build an image based on individual units similar to historic and contemporary image making. Reference Georges Seurat (Pointilism), Arthur Mole (photographer) and Chuck Close (contemporary American artist)
- Experiment with color theory and learn how to create a wide variety of tones using a limited palette.
- Learn how to apply a variety of mathematical concepts to art, e.g., measurement, graphing, coordinate points, resolution among others.
- Collaborate on a project and develop systems that enable community effort to create a mural.
Supplies Needed
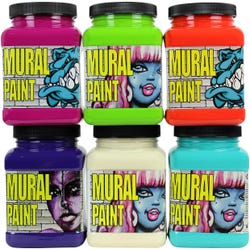
Chroma® Mural Paint, Assorted Bright Colors, Set of 6 Pints
Chroma® Mural Paint, Assorted Primary Colors, Set of 6 Pints
Fredrix® Wyland Paint It Yourself Mural Canvas, 32 x 60 in, Black
Fredrix® Wyland Paint It Yourself Mural Canvas, 32 x 60 in, White
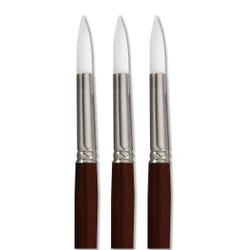
Sax® Optimum White Taklon Paint Brushes, Long Handle, Flat Size 4, Pack of 3
1567536 Sax® Optimum White Taklon Paint Brushes, Long Handle, Round Size 12, Pack of 3
1567549 Sax® Optimum White Taklon Paint Brushes, Short Handle, Round Size 12, Pack of 3
Standards
Standard #1: Generate and conceptualize artistic ideas and work.
Standard #2: Organize and develop artistic ideas and work.
Standard #3: Refine and complete artistic work.
Standard #4: Select, analyze and interpret artistic work for presentation.
Standard #7: Perceive and analyze artistic work.
Standard #11: Relate artistic ideas and works with societal, cultural and historical context to deepen understanding.
Instructions
1
Students will determine the theme for a mural, e.g. a banner for the school or community library to promote reading. A central, commanding image will then be created – keep it simple.
2
Determine size. Stock sizes can be used, or several canvases can be joined to better suit your design. Our example was made from two 3’ x 5’ canvases spliced to create a vertical banner that is 4’ x 5’.
3
Start with a to scale copy of the key image. This can be smaller than the original but must be of the same proportion width to height. Decide on the level of resolution in terms of the individual units. These units can be squares, circles, or single brush strokes.
4
Creating the resolution depends on how many units of a measurable size can fit within the dimension of the selected canvas. Examples: Using a 4’ x 5’ (48” x 60”) canvas:
- 1” unit size = 48 units horizontally and 60 units vertically. Total visual unit count of 2,880.
- 1/2” units = 96 units horizontally and 120 units vertically. Total visual unit count of 11,520.
By using half the unit size you geometrically increase the resolution 4 times.
5
Draw a grid over the copy image. On a blank piece of paper construct a similar grid and then observe corresponding units on the grided drawing.
6
In this lesson, painted areas are created from a palette of Chroma Mural Paint colors of Red (Stop), Orange (Fury), Yellow (Scorched), Green (Go), Blue (Ice), Pink (Pucker), Purple (Purple Haze), Black (Blacktop) and White (Polar). Use colored pencils to create a version of the key image on this grid. How can you translate the colors on the drawing onto the fresh grid with each unit only being of one of the pure, above listed colors? On separate sheets experiment with clusters of colors. A bright pure orange square on the drawing might be a one-to-one translation but for a lighter shade of orange, perhaps grouping 2 orange squares with 2 yellow squares might produce the desired visual effect for that particular area. Remember that close up you can see individual units in bright color but from a distance it is the average of the units that the eye blends together. Adding a complimentary color to another color can substantially shift the brightness or intensity of a color depending on the proportion of each color. For example, adding a touch of green to red will dampen the red’s brightness but equal proportions of red and green will produce a grayish, muddied color. Think about how areas will look when the concentrations and deposits of color are viewed from a distance. Experiment!
7
Grid the canvas by marking out all sides with the basic unit measurement with a measuring straight edge and connect the lines to produce a light, but visible grid.
8
Once the canvas is gridded and the key drawing has been prepared, use this drawing as a map to direct application of the paint colors. Use a brush similar in size to the unit, for example a flat 1” brush for 1” units, etc. It is highly recommended that a system of operation be established as it is very easy to get mixed up if randomly approached. Students are encouraged to figure this out as a group with these suggestions:
- One person can read and keep track of the map.
- Do one row (vertical or horizontal) at a time.
- Unless sullied, white spaces do not have to be painted.
- Possible to do one color at a time with one readeror 8 students each with one color from the palette, using a brush to complete the line without gaps.
- Number each horizontal and vertical group of lines in the margins at the extreme right and bottom of the canvas similar to the x and y axis of a graph. This will make it possible to more readily identify and locate a specific unit by its coordinate points.
- If mistakes are made, lightly daub the paint of that unit to remove as much as possible. Let it dry and then repaint.
Once all units are colored, hang the mural and observe it from a distance. Step back to observe the “Big Picture”! Up close, individual units take visual precedence. At a distance of 10” or more, however, these units visually blend together as if magic and the overall effect emerges. As a group, observe the mural from a distance and direct corrections or alterations from this vantage point to put the final touches on the piece. The overall contribution of each unit in relation to the total effort is a reflection of what a group can accomplish, in art and more broadly, in life when communities work together.
Alternative: The described mural project is complex but rewarding. However, for a shorter version try the following. Use the same rule that you are making individual paint marks with only one, pure color from the limited palette of red, orange, yellow, green, blue, pink, purple and black (white of the grounded canvas unless need to reintroduce the white). Grid the canvas as described above, including resolution concerns, and project an image onto the canvas. Students can then apply color while the image is projected, translating the colors of the original drawing on the spot for more of a pointillist rendering.