Getting an Angle on Klee

Description
Lesson Plan and Artwork by Jack Matthews
They are all around us, in all aspects of our environment. We cannot escape them. They are called geometric shapes. Just as we see them and call them by name, artists have used geometric shapes both concretely and abstractly in their work. One artist who incorporated geometric shapes into his paintings was Paul Klee. This lesson provides students the opportunity to utilize shapes expressively and/or abstractly in order to create a fanciful environment. The more they add to their piece, the more the viewer has the opportunity to look deeper into the body of the work.
Objectives
- Teachers will share and discuss with students examples of the work produced by artist Paul Klee.
- Students will study the use of geometric shapes, repetition of shapes and how placement is important to a composition.
- Students will be selective in the use of their color palette in order to make a pleasing and well-balanced composition.
- Students will produce their own composition comprised of geometric shapes, selective color, and emulating a style similar to that of Paul Klee.
Supplies Needed
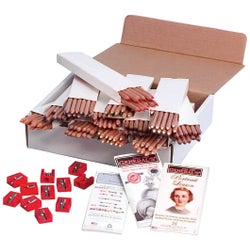
Variety of Pastel Chalk Pencils
Extra-White Sulphite Drawing Paper 12 x 18
Cold Press Heavyweight Watercolor Pad, 140 lb. 9x12
*Here are the supplies needed for this lesson plan for reference. Find a convenient carousel of shoppable products for this lesson below.
Standards
Standard #2: Organize and develop artistic ideas and work.
Standard #11: Relate artistic ideas and works with societal, cultural and historical context to deepen understanding.
Instructions
1
After receiving all materials for the lesson, students will take their ruler, marking off 1/4 to 1/2 inch all around the picture surface. This will create a frame that will help students in the following steps.
2
Students will draw various straight lines across and down their paper. Lines do not have to go completely from one side to another. NOTE: keep it simple! 3-4 lines in both directions. These lines will create the various rectangles, squares, trapezoids, and parallelograms that will be seen in the final piece.
3
After selecting a color palette, students will use a piece of heavy watercolor paper (approx. 4”x4”) and, using a pastel chalk pencil, will color one of the edges of the 4”x4” square.
4
Students will then lay the color edge against one of the shapes on their composition. Holding it in place with one hand, students will push the color from the square onto the paper with a finger or thumb. They will repeat the process with the same color in order to work on all sides of the shape.
5
Students should plan out which shapes will utilize the same color (same-sided color shapes should not touch each other) and fill in all shapes that are selected for that one color before proceeding to the next color.
6
Turning the square to a clean edge, students will use their second color choice and follow procedures 3-5. Students will do this with each color they select for their shapes.
7
Once all shapes have been filled in, students may begin to enhance their composition with further shapes. Example: Coloring the edge of the square, students can begin to create triangle rooftops. Further enhancement can be made by cutting out rectangular shapes and squares from an additional piece of scrap paper, coloring their edges, and rubbing them onto the composition to create doors and windows.
8
Varying lines can be created to develop background hills, waves, rolling clouds, etc., by cutting out a shape, coloring the edges, and rubbing it onto the composition page.
9
Last embellishments can be made if the student wishes to add further details to buildings (walls, brick, rails, fencing, flowers, etc.) NOTE: Discuss with students varying color palettes such as warm, cool, analogous, monochromatic. Students should limit the colors they use to 3 or 4.


