
Close

Prehistoric Fish
Lesson Plan, Grades 4-6, Art, Science, School Smart, Sax
Description
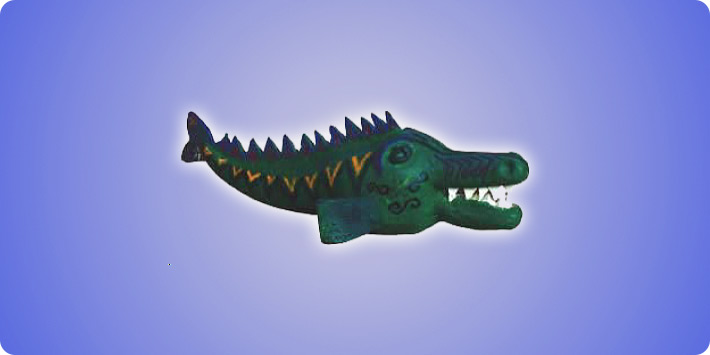
Elementary students love the idea of dinosaurs and other prehistoric animals-creatures that actually walked the earth, but look like something from another world. Engaging them in creating three-dimensional replicas of what they think these ancient beasts looked like is a sure way to get their imaginations going and connect their creative ideas with facts learned in Science class.
Objectives
- Students will demonstrate understanding of prehistoric animals by creating models of them that incorporate their knowledge of actual aspects of these animals as determined by science.
- Students will demonstrate knowledge of the elements of design by using them effectively to create their stated, desired effect.
- Students will demonstrate knowledge of the material used to create their prehistoric creatures by successfully constructing a three-dimensional model that holds together well both physically and visually.
Supplies Needed
School Smart Air Dry Clay, Red, 25 Lb., Moist 402815
Plastic Modeling Set 419377
Double Wire-End Tools, Set of Seven 1440530
Sax True Flow Acrylic Paints, Set of Six, Half Gallon Bottles 439307
Things You May Also Need:
Toothpicks
Brushes
Standards
CONTENT Standard #1: Understanding and applying media, techniques and processes.
Grades 5-8: Students intentionally take advantage of the qualities and characteristics of art media, techniques and processes to enhance communication of their experiences and ideas.
CONTENT Standard #2:
Grades 5-8: Students employ organizational structures and analyze what makes them effective or not effective in the communication of ideas.
Instructions
1
Discuss scientists concepts of how various prehistoric animals looked.
2
Have students sketch some ideas on paper and choose their favorite one. What shapes and lines will create the mood they desire?
3
Students should start with a ball of clay and sculpt it into the main shape of the creatures body.
4
The body should be hollowed out somewhat to promote faster drying and to conserve clay. One way to do this is to use a wire end tool to scrape out some of the inside from the underside of the sculpture. Another possibility is to cut the body shape in half, hollow out both halves and rejoin them by using a rope of clay blended in with a modeling tool all around the seam line.
5
Add limbs, fins, wings, head and tail as needed. To add a smaller shape to the body, insert a toothpick into the smaller piece of clay, leaving some of the toothpick sticking out. Stick the smaller piece of clay where it belongs on the body, e.g. the head would be stuck onto the front of the body. Again use a thin rope of clay all around the seam line and blend it in with a modeling tool to create a strong joint.
6
Add details such as facial features, scale or fur textures, spikes, claws, etc.
7
Let the creature dry for several days. Be sure to prop up any parts of the body that sag.
8
After the creature has dried, discuss how colors can create different moods. Let the students select colors of acrylic paint for their creature.
9
Have the students paint the creature with their selected colors.