Close

Origami Relief, Zentangle Inspired Design
Lesson Plan, Grades 9-12, Sax Lesson Plans, Art, Math, Social Studies, Faber-Castell
Description
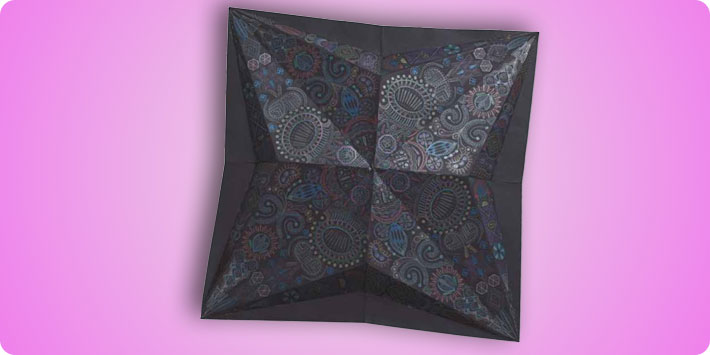
Zentangle® is a contemporary art form that explores the use of pattern, shape and symbols and while in the process, beautiful, intricate designs emerge. The added elements of an origami relief, along with metallic pencils on black paper, bring another twist on the traditional ink pens and white paper designs. It is still based on geometric forms with embellishment, but now challenges the artist with the incorporation of depth.
Objectives
- Students will incorporate repetitive, geometric shapes, patterns and/or symbols, using templates, hand-made stencils and drawing to create an intricately, embellished origami relief design.
Supplies Needed
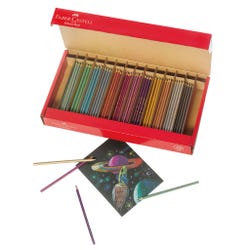
Faber-Castell® Metallic Colored Eco Pencils, 12 Color Set 401304
Or the School Pack of 240 (20 ea. of 12 colors 407258
Sax® Colored Art Paper - Black, 12" x 18", Pack of 50 402014
All Purpose Templates 1335308
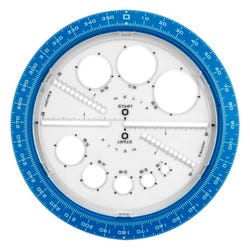
Helix® Angle and Circle Maker (Protractor and Compass) Resources 1301314
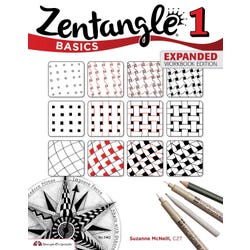
Design Originals Zentangle® Basics by Suzanne McNeil, CZT 1397171
Design Originals Zentangle® 2 by Suzanne McNeil, CZT 1397172
Design Originals Zentangle® 3 by Suzanne McNeil, CZT 1397173
Design Originals Zentangle® 4 by Suzanne McNeil, CZT 1397174
Also Needed:
Vinyl eraser
Ruler
Pencil with vinyl eraser
Glue or tape
Optional Supplies
Square Template 435140
Isometric 435143
Circle Template 574096
Any X-ACTO® knife and tag board if you'll be cutting your own template shape.
Standards
CONTENT Standard #1: Understanding and applying media, techniques and other discipline.
CONTENT Standard #2: Using knowledge of structures and functions.
CONTENT Standard #3: Choosing and evaluating a range of subject matter, symbols, and ideas.
CONTENT Standard #6: Making connections between visual arts and other disciplines.
Instructions
1
Cut black paper to a 12" x 12" square.
2
If you wish to create your own origami-type folded relief, experiment with practice paper first and then fold your black paper and skip to step
3
If you're going to use the origami fold for the pictured artwork, use the color-coded folding illustration and the following directions.
4
Back side up, fold in half creating both blue folds.
5
Front side up, fold in diagonal half creating both red folds.
6
Back side up, bring the bottom edge to meet the red diagonal fold, creating the green fold. This fold is only need from the corner of the paper to the blue half line. If you wish to create more sections, feel free to extend the fold all the way across the paper. Repeat this fold 8 times to the left and right of each corner.
7
Front side up, fold the bottom edge up to the green fold, creating the orange fold, again, only needed from the corner to the blue half fold, but may be extended if desired. Again, repeat 8 times, to the left and right of every corner
8
Decide if you like the back or the front of the paper, as you coax your folds into a relief.
9
A discussion of pattern and radial design may be appropriate with the students as well as the role of repetition, details and embellishments.
10
Lay the paper flat again.
11
Using the metallic pencils create 4 shapes in every other section around the radiating design, or 8 shapes, positioned in the same place in each section and as close to the center as possible. Use templates, your own hand-drawn lines or hand-made templates with tagboard and an X-ACTO® knife or scissors. The shapes may or may not touch, may be on the folds or between them, colored or filled with simple patterns or symbols.
12
You may wish to use a compass to make some lightly drawn guide lines to keep the radiating pattern even. For errors or smudges, use a vinyl eraser to remove most of the mistake, depending on the pressure and color.
13
Continue with another, 4 or 8 shapes, touching the first or not, perhaps connect shapes with drawn lines which create other shapes, always making sure the placement is identical, all 4 or 8 times around the radiating design.
14
For variety, you may wish to change the over-all design from repeating 4 shapes to 8, or vice-versa. The possibilities are endless. The drawing is completed when it is your desired size and shape or when you've filled the raised portion of the relief.
15
To finish, mount on mat board or another sheet of paper. Slitting the fold from the middle of each side (blue fold in diagram) up to the orange line will allow the area from the orange fold to the edge to either lay flat or be tucked under the relief. Position the relief at the desired height and glue or use double sided tape to secure in place.